Battle Tanks Nederland

BTN is de club voor 1:16 en 1:15 RC BATTLE SYSTEM tankliefhebbers
Het is nu 30 apr 2024, 22:10

Alle tijden zijn GMT + 1 uur


Plaats een nieuw onderwerp Antwoord op onderwerp  [ 14 berichten ] 
Auteur Bericht
BerichtGeplaatst: 31 maart 2014, 15:42 
Hi all,

after me Ralf asked that I , I have to worry about the time of his suspension Ferdinand finally found the time.

In the inventory I noticed first time , .... it's the hardest Ferdinant / elephant who previously stood with me at the table.

Afbeelding

Every single pair of rollers must be loaded with approx 1400g plunge by about 30% and this is a huge breakaway torque . I've got 10kg placed on the pan without the suspension institutions did something to dive . Only at 12kg , she fell to about 2/3 of the suspension travel. That is clearly too much.

So I first made ​​a few feathers , but unfortunately forget the pictures.

The old springs have a thickness of 1.3 mm and 1.2 mm , the new now .

Afbeelding

Afbeelding

Here it is also nice to see . Links old and new right .

Afbeelding

And as the springs are mounted in the roller carriage.

Afbeelding

Now that I have the parts machined something that changed the springs and donated a drop of oil , the cam roller runner now bagged at about 450g to a 30 % of the suspension travel.

So I will then provide the two front and rear roller car with the new springs and make the Middle and viable. Thus, the suspension then likely with appropriate weight distribution work much better than before. Is the armor are also considerably less and easier to go around curves A pleasant side- effect.

However, the conversion is so far from being completed . I must think of something else let me as I roll over the cam roller runner while driving makes sense and what prevents most right now bothers me , align the holes somehow . So tracks are pre- derailment.

Afbeelding

The rear roller carriage on the left side is wrong because the holes in the suspension was not made freehand .

Cheers , Edwin


Omhoog
  
 
BerichtGeplaatst: 01 apr 2014, 15:58 
Yesterday, I 've begun to align the crooked trolley . In addition I have just turned off the bush a little , the cam roller runner blocks to the others plugged into aligned and the bearing bush , which even now has a lot of play in the bracket is glued in place.

Afbeelding

Afbeelding

Afbeelding

After the could now harden overnight I had to remove a bit of the overflowing glue.

Afbeelding

Next, I first wrapped a few stop springs are intended to prevent the overturning of the roller carriage.

Afbeelding

These are then fitted onto the axle and allow about 20 ° free commuting in any direction to it to increasingly inhibit this oscillation .

Afbeelding

Afbeelding

Afbeelding

Inside it looks like this .

Afbeelding

Now he is ever on its own wheels and dips with a weight even as you want something a .

Afbeelding

The large starting torque is not gone yet , but that will still settle already . But we now see that the roller trolleys not only cigarettes , but also compress .

Afbeelding

After the drive issues are resolved come the gears turn. Since I will first times to make new , longer axes so that the flat gear clean can .

Afbeelding

In addition, I have the angled mounting plate of the gear to make some adjustments . Since first true nothing and so you can not mount it .

Afbeelding


Omhoog
  
 
BerichtGeplaatst: 03 apr 2014, 19:01 
Today then were the axles turn. Since I do not need long in the flat gear and I'm from 8mm silver steel.

First, I turn the long part off of 5mm.

Afbeelding

Afbeelding

Then I need in each axis still a hole and cut a M4 thread.

Afbeelding

Afbeelding

Then only thing missing is the flattening of the drive, but that is milled off quickly.

Afbeelding

[img]http://up.picr.de/17852436bc.jpg/img]

The finished axes I then degreased and well incorporated into the gearbox. Thus, the gears do not always solve it has proven this to be glued to the axle. This must now harden overnight.

Afbeelding


Omhoog
  
 
BerichtGeplaatst: 04 apr 2014, 16:08 
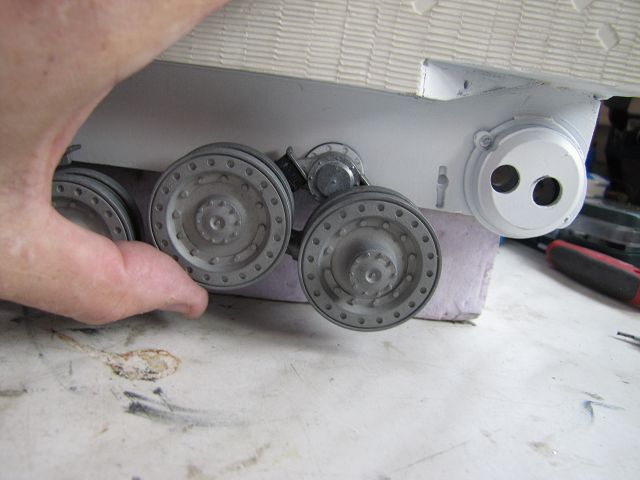
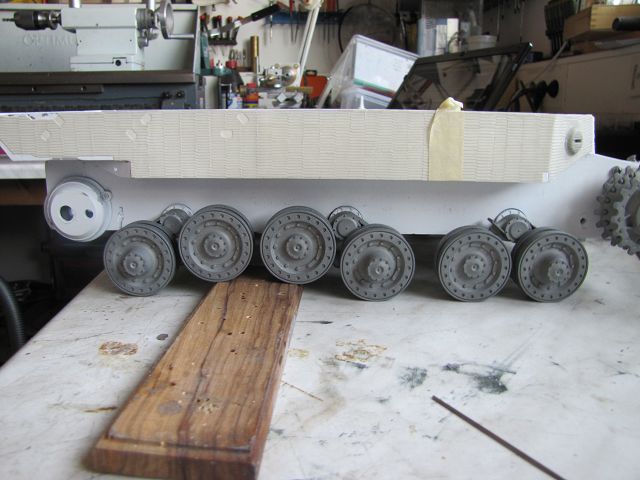
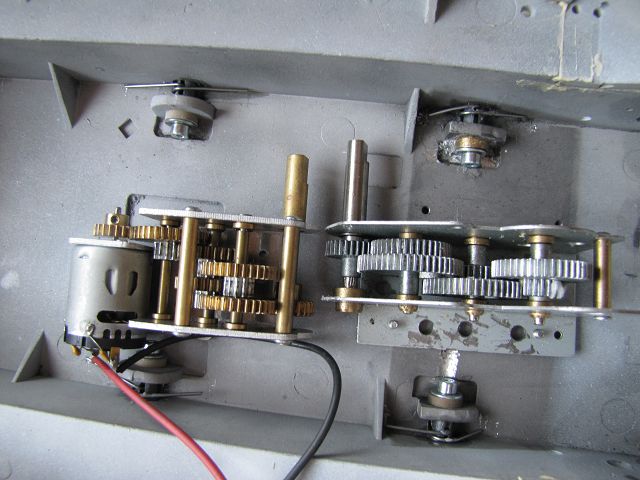
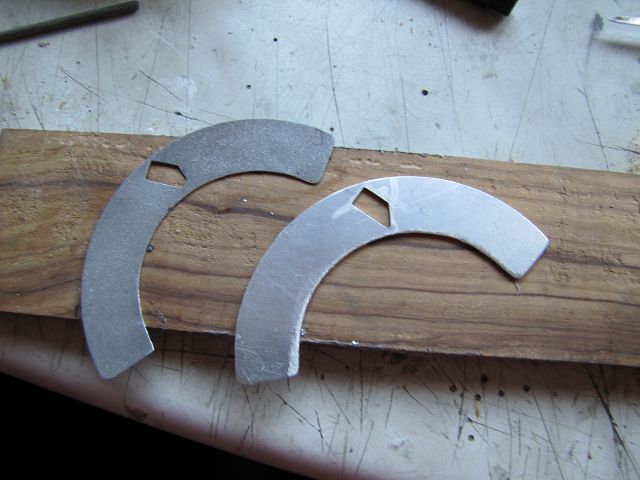
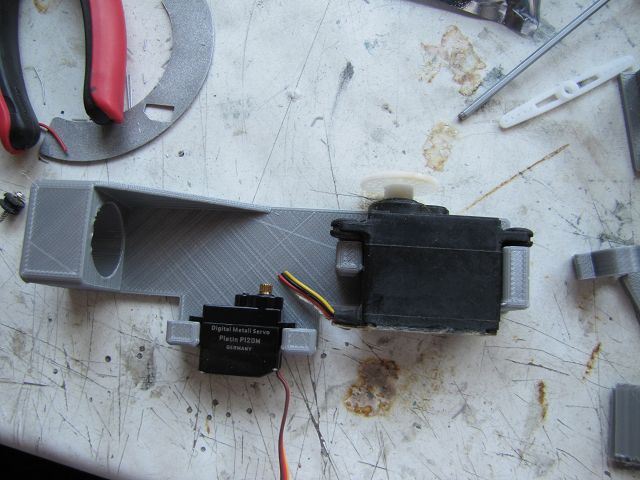
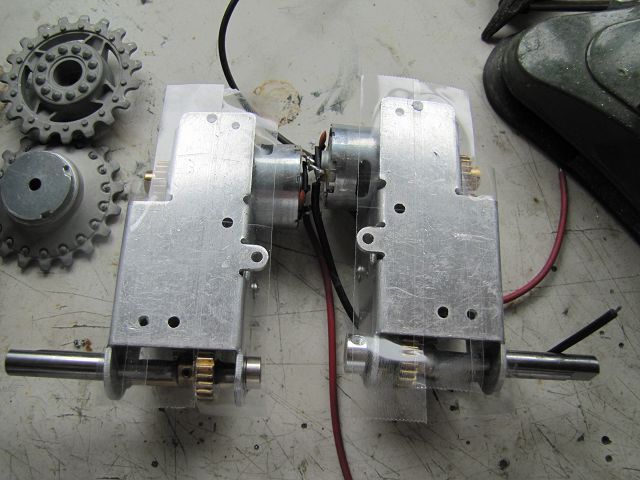
Once the axes are now adhered was the replacement of the motors of the series. Here you can see the size difference .

Afbeelding

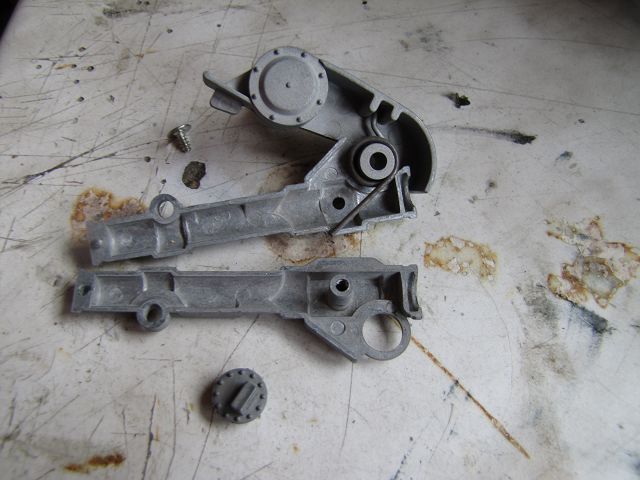
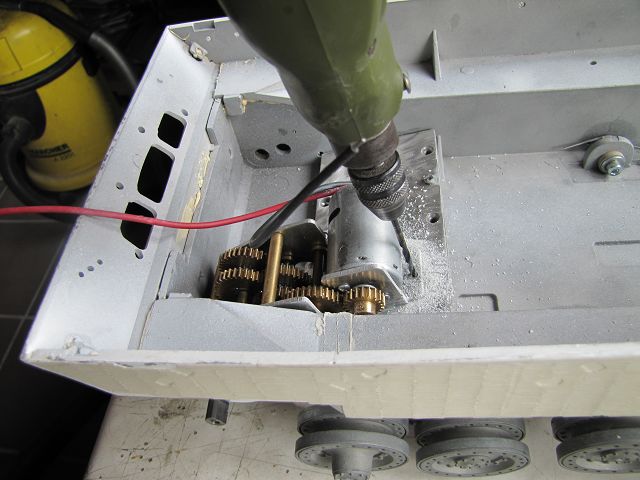
Then, the transmission could test sit for the first time .... the art of the matter is they installed so that they also get out again.

Afbeelding

Since I can not be mounted directly to the mounting plate the gearbox because it has a too shallow angle I had to think of something and sometimes the simplest solutions are the best.

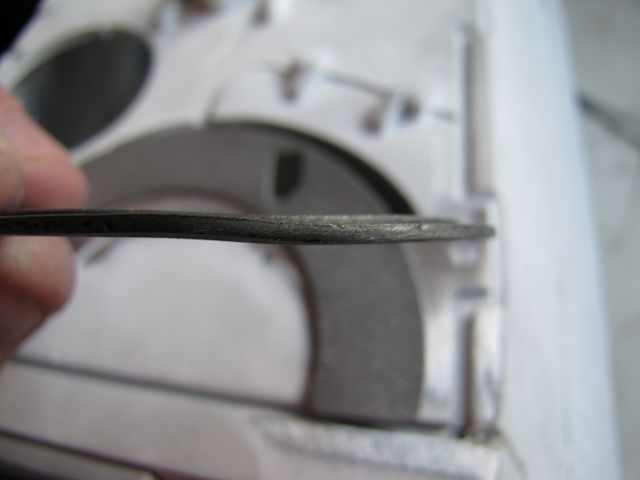
First I taped off the bottom of the gearbox with tape .

Afbeelding

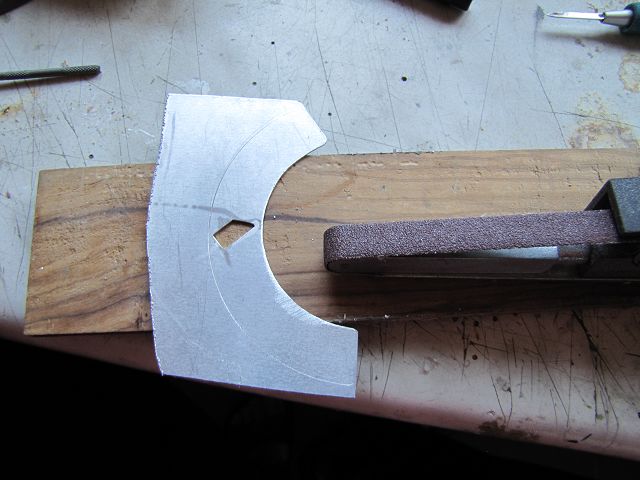
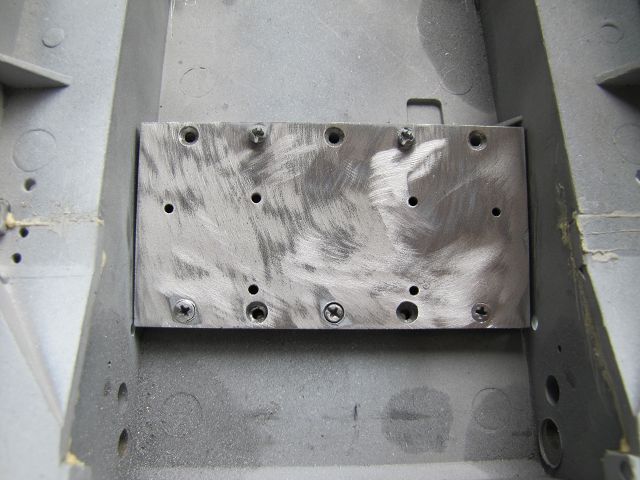
The old mounting plate I have well sanded and degreased.

Afbeelding

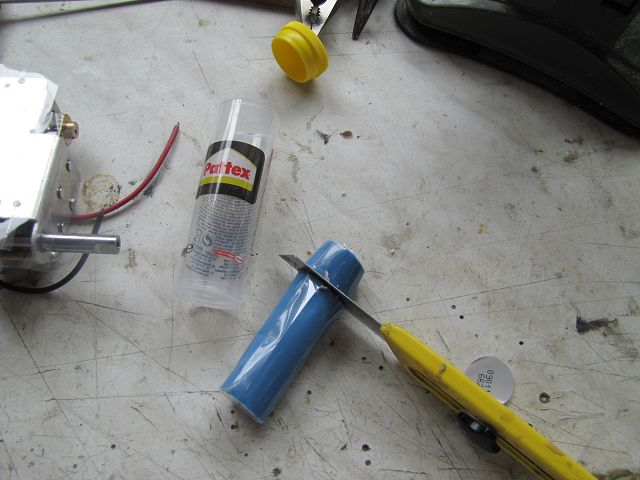
In order now to get a good rest of the gear I use epoxidized kneading . Of these, so just cut off a piece , knead well , but always with gloves and spread it on the bottom of the gearbox.

Afbeelding

Afbeelding

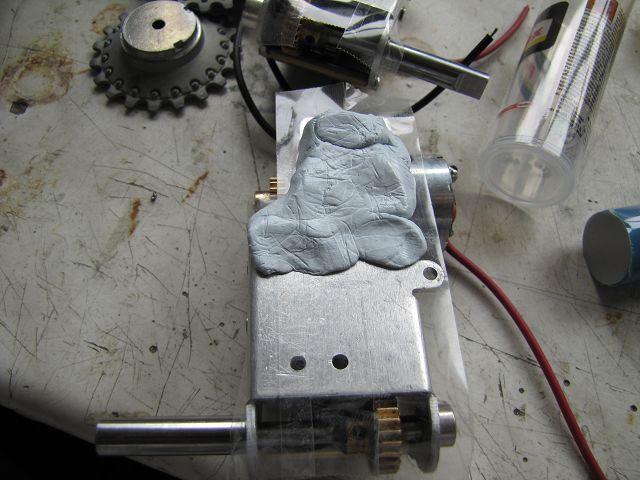
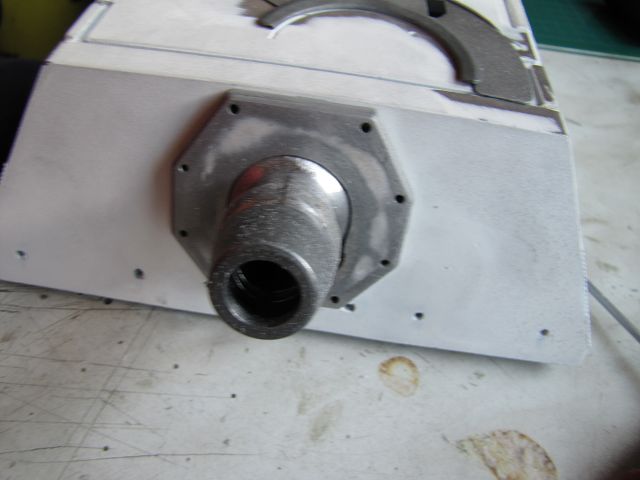
Then you can push the gear into its final position on the mounting plate and align. What you should always do with a gearbox because the kneading epoxy is relatively fast hard.

Afbeelding

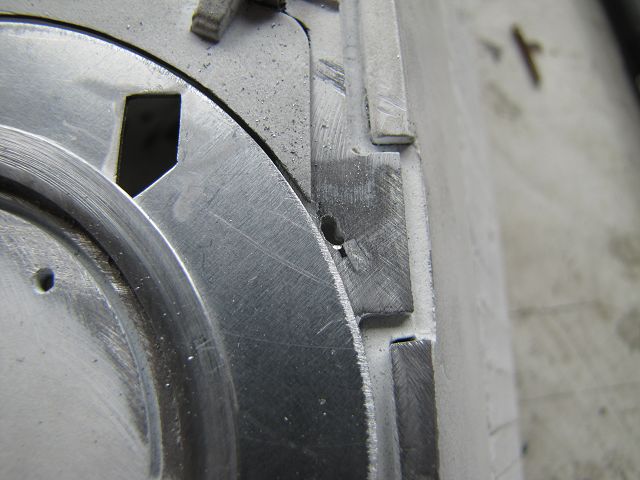
The adhesive strip prevents sticking of the gear but considers it ever so firmly , that the holes for the new mounting screws should some through the transmission.

Afbeelding

After you have added all at least an hour , you can simply pry off with a screwdriver , the transmission and remove the adhesive film . So then what is the new mounting plate.

Afbeelding

Throughout the process I repeat with the other gear on the other side .

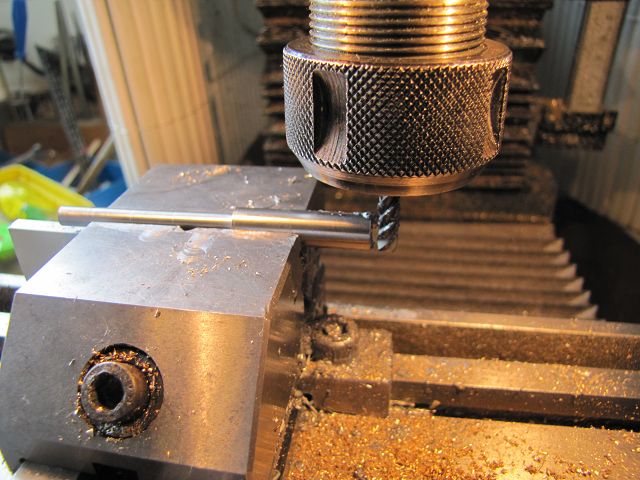
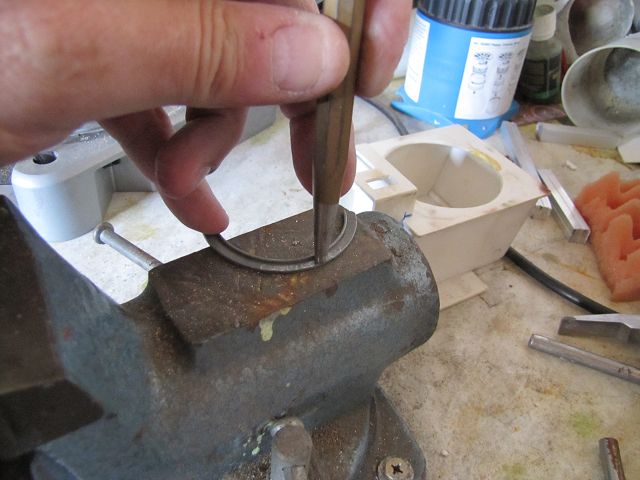
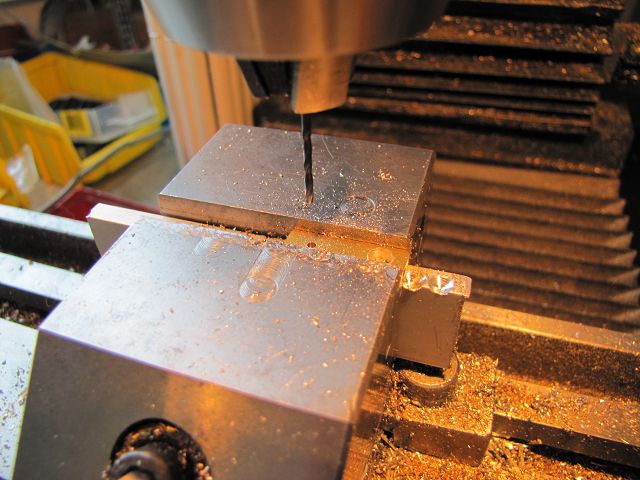
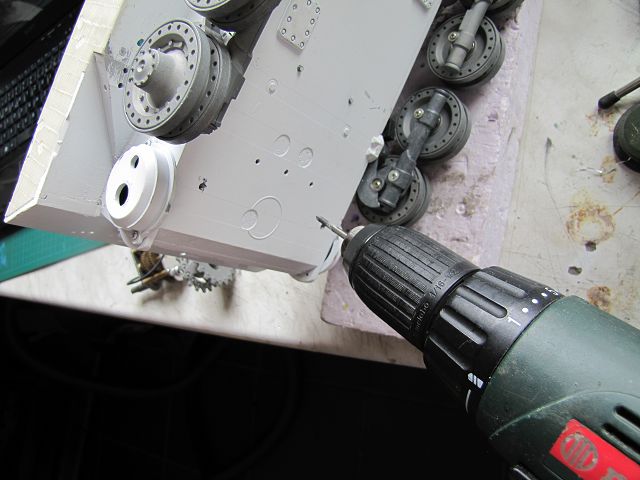
In conclusion, I still cut the thread into the holes, with 2 per gear are perfectly adequate and mount these .

Afbeelding

Afbeelding

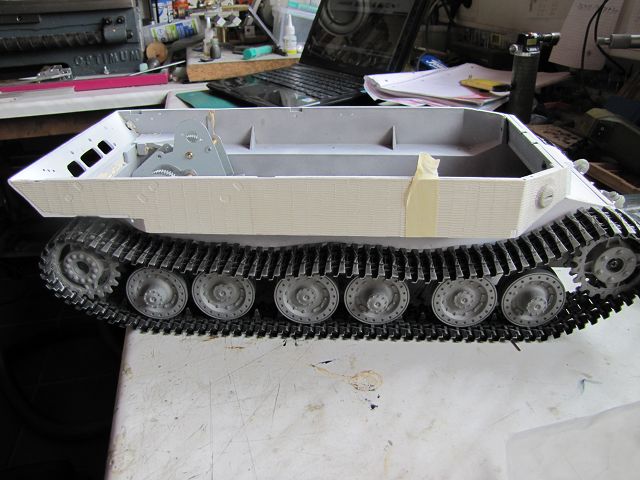
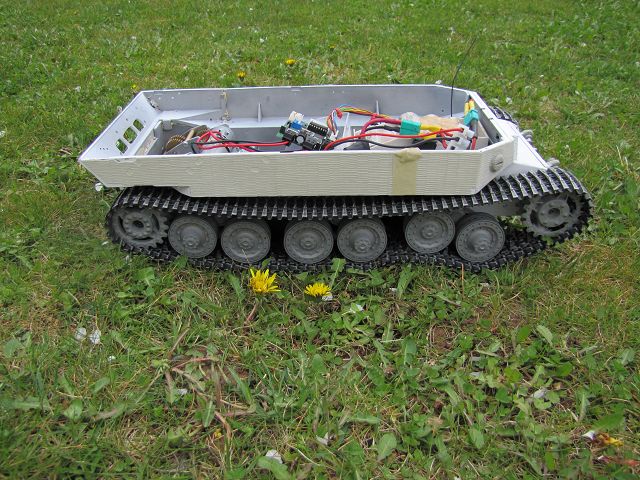
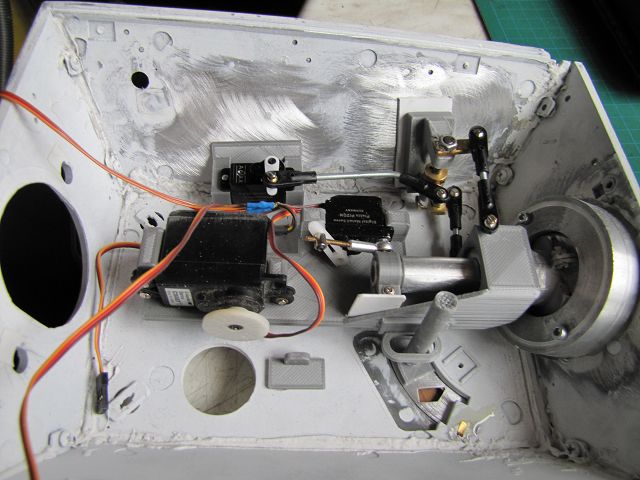
I then brought up the chains to the conclusion for today.

Afbeelding

And I've noticed , however , that I still have to revise something the idlers , but that's just one small thing and then it goes to the first test drive.


Omhoog
  
 
BerichtGeplaatst: 05 apr 2014, 15:49 
Today, the Ferdinand drove ....

But only after several teething problems .

First off, did not want my electronics for standard motors . For some reason I had as only load new firmware.
When the Elo then worked I had to notice that the motors are unfortunately completely unsuitable . I always get in test mode with 9.6 V , but these were not sufficient to the tank on smooth tile floor put in motion uzu . Even after I had pushed him a little he stayed 2m resist . So the Motroen out again and Other pure. Since I thought I had two speed 400 lying around . That was so , but with a 4.8 V and the other with 6V rated voltage. So not usable. Ultimately, I have found and installed engines from a 3:1 gear steel . He moves now and I could make a first test drive.

Afbeelding

https://www.youtube.com/watch?v=WWcD97G ... e=youtu.be

Very pleased I 'm not , but the suspension works , though still stubborn . Since they must, however, only be retracted. The roller carriage runs as quietly as I tilt me introduce myself without too hectic around. What I still have to adjust a little bit is the inclination of the first trolleys on which also was still very little load .

In addition, the chain is too long. The chain tensioners are the stop and the chain runs from dadruch always . These lack the chain stripper án the trough bottom , so you better not moving backwards , because otherwise the chain hangs .

The speed is in my opinion ok . , Since I 'm going with 8 cells , but I'm long gone down such a feeble tanks. This could more and only 6 cells are still short of 2kg, at least on grippy surfaces as the drive and the wide track requires a lot of energy .


Omhoog
  
 
BerichtGeplaatst: 07 apr 2014, 17:35 
After yesterday I was not really satisfied with the drive and the Elo I have installed today Brushless times.

These are in addition to your strength also significantly smaller. Here a brush motor next to a brushless motor in the tub.

Afbeelding

To get on more weight I also put a nice piece of iron into the tub.

Afbeelding

The chain I have also still the same shortened and slightly more excited and then the test drive could start. Now it has a very different but equally driving display and it is more than enough power available ..

https://www.youtube.com/watch?v=pB7luN2 ... e=youtu.be


Omhoog
  
 
BerichtGeplaatst: 09 apr 2014, 22:14 
No problems running in the gras, great stuff


Omhoog
  
 
BerichtGeplaatst: 15 apr 2014, 15:15 
Soooo ,

completely finished the tank is not yet. The gun is also fully articulated into place.

But since I have first pleasure in the warped castings.

Afbeelding

Here is a recoil is not possible because the gun barrel is completely jammed .

So I have the guide first time glued and screwed to edit them properly can .
Then the guides inside polished carefully to clean the pipe is running.

Afbeelding

Afbeelding

And finally also glued the end cap and adapted to the tube. The supernatants in the visible areas around the ball mount as far as I filed and sanded . Ralf is because although a little spatula to yet, but the holes may not be filing away .

Afbeelding

Afbeelding

I have glued the frame of the ball holder with the outer structure At the end of today.

Afbeelding

Now it first heist again waiting for the curing of the adhesive.


Omhoog
  
 
BerichtGeplaatst: 18 apr 2014, 16:03 
For installation of the cannon I had to grind down and adjust the Kugelklagerung strong, as I have read in various construction reports the problems that occur when the cannon. Also with this kit , the pivot point is not true. That's why I 'm building a real ball bearings. Since I have several hours needed to really had the shape of a sphere.

Afbeelding

This works best if you painted the ball with a marker and then turns into a slightly smaller metal ring. At the grinding marks can be clearly seen where you have to grind away .

Afbeelding

Afbeelding

Afbeelding

In order to check the result properly but you have to polish the surface again and again.

Afbeelding

They do provide an acceptable time round ball .

Afbeelding

The outer ring had to be polished only on the support and fit . Inside I have a turned aluminum , whom I have given a corresponding groove .

Afbeelding

In between, again, an adapted aluminum ring was rotated and drilled through both rings two mounting screws.

Afbeelding

Afbeelding

Afbeelding

I have done so until nearly backlash-free , but easy to move the ball between the rings.

Afbeelding

Afbeelding

At last for today, I have put together everything glued to the inner ring with the housing wall and with two clamps pressed until the glue is hard.

Afbeelding


Omhoog
  
 
BerichtGeplaatst: 19 apr 2014, 16:00 
The carriage is now ready and moves as it should be .

Afbeelding

Afbeelding

Then came today finally the post with the support of the visor cover , and ....... well ........

Afbeelding

So I can not build a movable sighting device as Ralf wants. So I tried very carefully a little to turn everything straight.

Afbeelding

It almost I succeeded , but it should not be.

Afbeelding

Since I will probably have to build the bracket as well as the visor plate new.

Before I begin , I had but that the support level and adjust the visor cover of rounding . The cover was also slightly bent and lay diagonally on the cover, so yes what should not be. So the surface ground flat , directed the lid and adapted to the curvature of the lid vorsicjhtig with a polishing wheel .

Afbeelding

And so it should look like ...

Afbeelding


Omhoog
  
 
BerichtGeplaatst: 22 apr 2014, 16:50 
Since I do not trust the visor cover if I wanted to make them straight , I make a New 0.8mm aluminum.

Afbeelding

Afbeelding

Afbeelding

Afbeelding

Afbeelding

Afbeelding

Afbeelding

Since my front guide is indeed broken when straightening I do the New also made of aluminum , which is not so easy in the filigree part .

Afbeelding

Afbeelding

Afbeelding

Afbeelding

Afbeelding

And now glued .

Afbeelding

And now I 'm going to design and build the mechanical and internals for Kannonenefolation . Since I now use my 3D printer.

Afbeelding

Morning the parts should be ready ready.

Afbeelding


Omhoog
  
 
BerichtGeplaatst: 23 apr 2014, 16:15 
Now that the print overnight was done I had these parts in front of me .

Afbeelding

The support that is built to support the prints in the implementation of the joint was removed quickly and easily.

Afbeelding

When ball joint I've cut off the screw and ground over something . So I could pipe the rocker after I had this even minimally reworked simply push on .

Afbeelding

The driver for the gun barrel I have also included.

Afbeelding

On the rocker I immediately suitable mounts for the servos provided what it looks like this .

Afbeelding

But anyway , I have something I must change .

For the lateral direction , which operates simultaneously as a twist I have to make the bracket for the deflection again again and then also equal to a suitable servo mount . By the way me a very simple mechanism is still remembered so that it rotates to fit the visor in lateral alignment of the cannon. For that I have the drawing again supplemented and print the up again tomorrow from .

Afbeelding

Afbeelding

So I have when required , or if it is to have someone complete a print file of all parts always have .


Omhoog
  
 
BerichtGeplaatst: 25 apr 2014, 15:45 
Nice and slow one end of my work on the Ferdinand is foreseeable.

I 've now designed and printed a simple driver for the visor .
In addition I have glued a long hole tab on the side of the rocker .

Afbeelding

A stamp on the underside of the visor then later glued and this takes the visor then the lateral straightening.

Afbeelding

But it goes on first with the redirection page for straightening. The I also have a little improved.

Afbeelding

The lever of the deflection do I feature a brass profile I drill identical for all three levers.

Afbeelding

Afbeelding

Fully assembled it looks then like this. Here already the ball heads.

Afbeelding

I also screw each at the top and underside of the rocker a ball , since the articulation of rotation is the same .

Afbeelding

And so it is then assembled later.

Afbeelding

Afbeelding

Then I have the power for the recoil and mounted for lifting and lowering.

Afbeelding

Now that 's missing is the articulation on the fighting compartment roof for pipe evolation and two brackets on the roof top for the visor .


Omhoog
  
 
BerichtGeplaatst: 28 apr 2014, 17:42 
The holders of the visor are now glued . But this I first had to drill through the mounting points and also set a new one , as the Intended is the wrong place .
In addition I have pierced the roof with a 1.2 mm drill and freehand extremely carefully milled with a 1.2 mm tungsten carbide bur the slots . If it has no feeling but should rather be , since it can be an expensive quickly with broken cutters.

Afbeelding

Afbeelding

So I had to cut only two small brass strip , bend and push through the long holes . At the bottom I have then also bent and glued .

Afbeelding

Afbeelding

Afbeelding

When, after the adhesive has cured everything was nice too smoothly , I can now start to assemble the mechanism.

Afbeelding


Omhoog
  
 
Geef de vorige berichten weer:  Sorteer op  
Plaats een nieuw onderwerp Antwoord op onderwerp  [ 14 berichten ] 

Alle tijden zijn GMT + 1 uur


Wie is er online

Gebruikers op dit forum: Geen geregistreerde gebruikers en 16 gasten


Je mag geen nieuwe onderwerpen in dit forum plaatsen
Je mag niet antwoorden op een onderwerp in dit forum
Je mag je berichten in dit forum niet wijzigen
Je mag je berichten niet uit dit forum verwijderen

Ga naar:  
cron
Powered by phpBB® Forum Software © phpBB Group
phpBB.nl Vertaling