Battle Tanks Nederland http://www.battletanksnederland.nl/phpBB3/ |
|
A new job remodeling a Stug http://www.battletanksnederland.nl/phpBB3/viewtopic.php?f=60&t=7740 |
Pagina 1 van 2 |
Auteur: | Edwin Altmann [ 30 jun 2014, 18:03 ] |
Titel: | A new job remodeling a Stug |
Hello, 
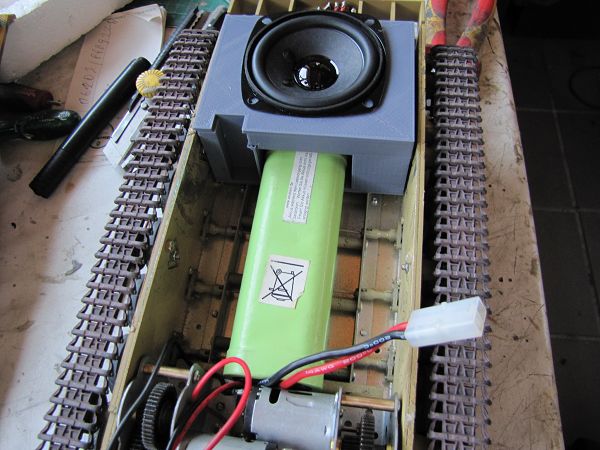
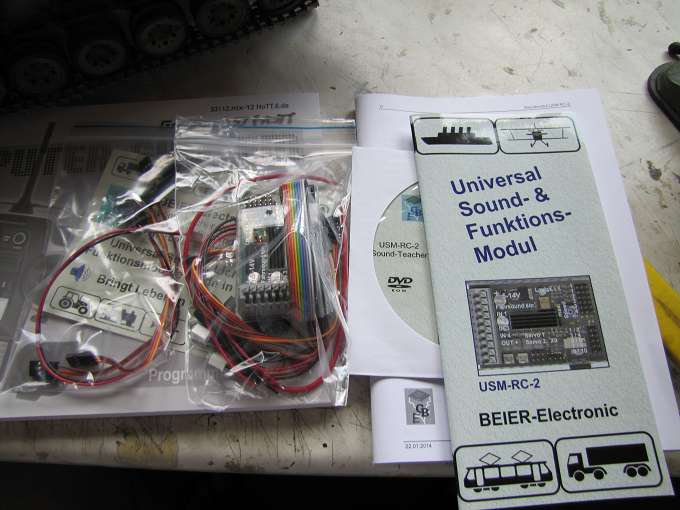
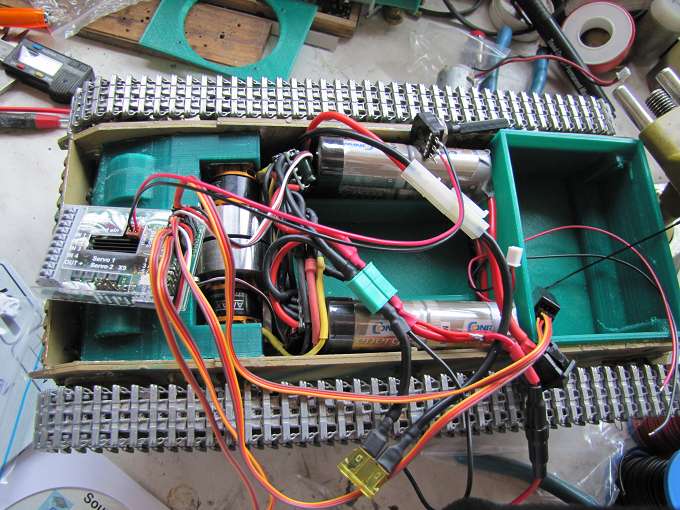
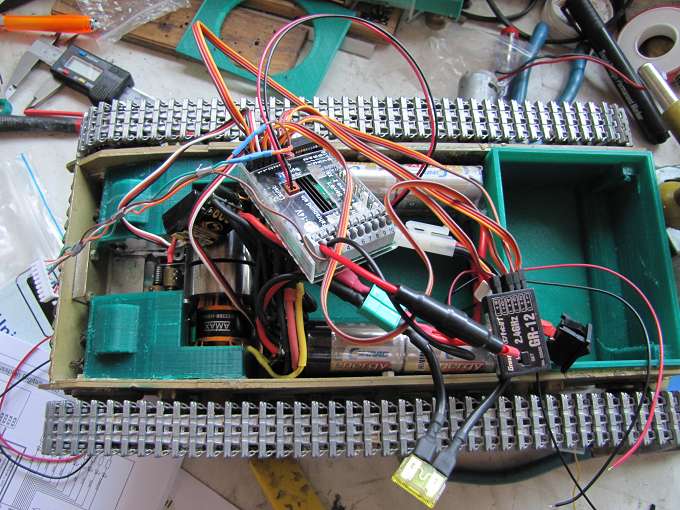
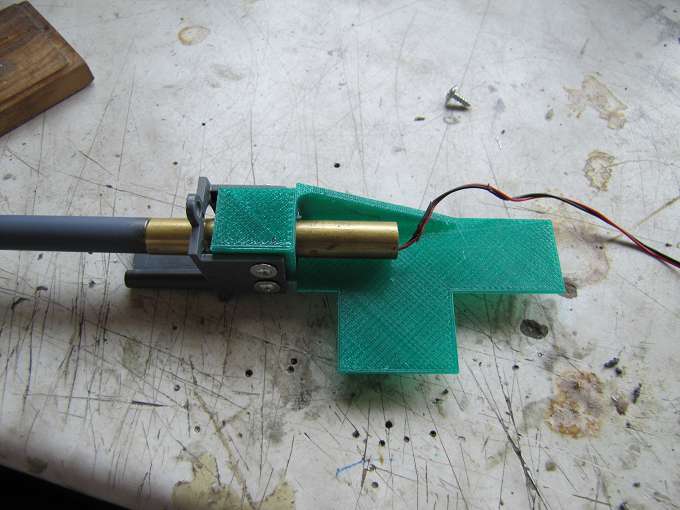
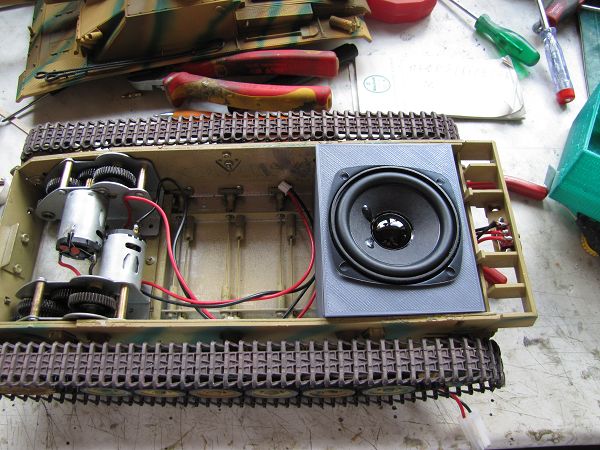
I build again in a Stug on behalf of all the technology and to developing this conversion also exactly the right speaker, a use for battery and electronics and a tube rocker with side direction of servo operation. 
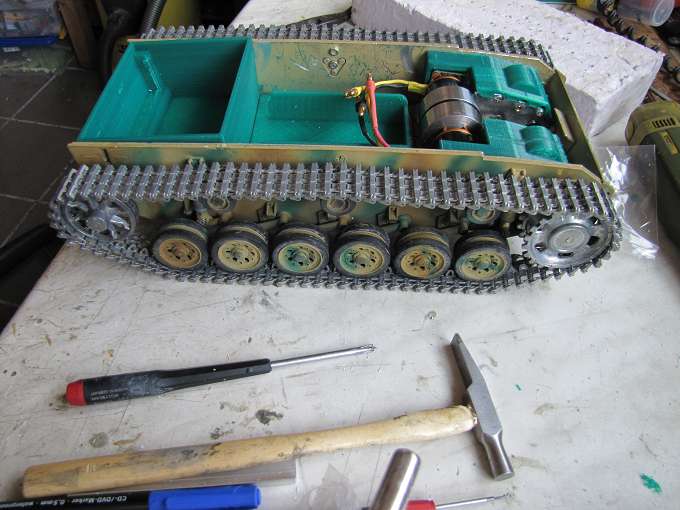
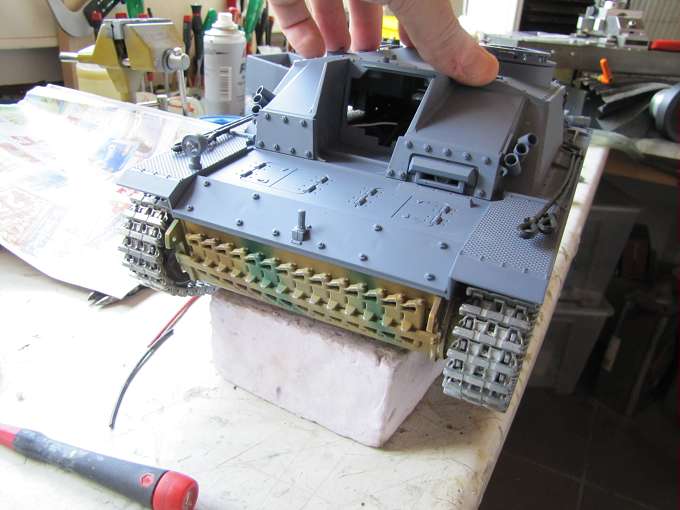
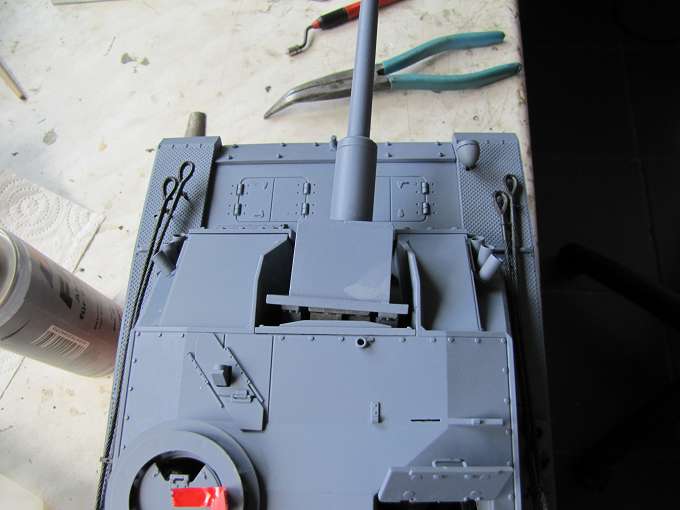
The Bassis for the conversion I have already contacted me. A Stug with metal hull. 
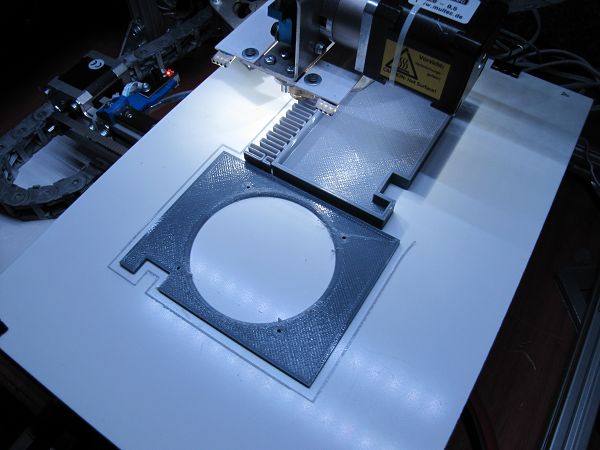
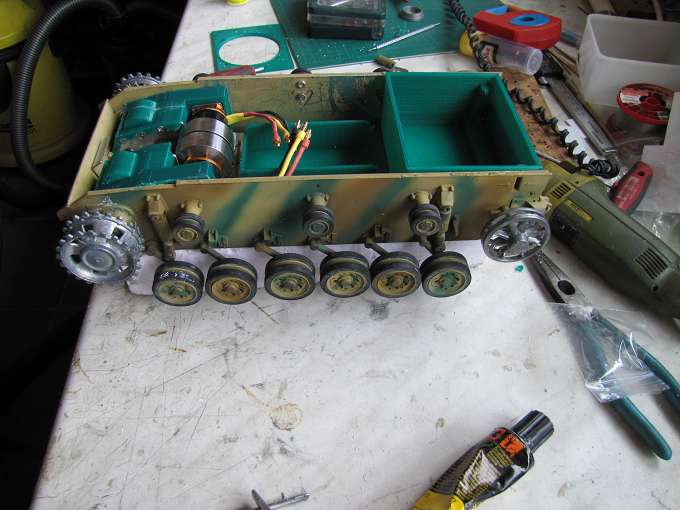
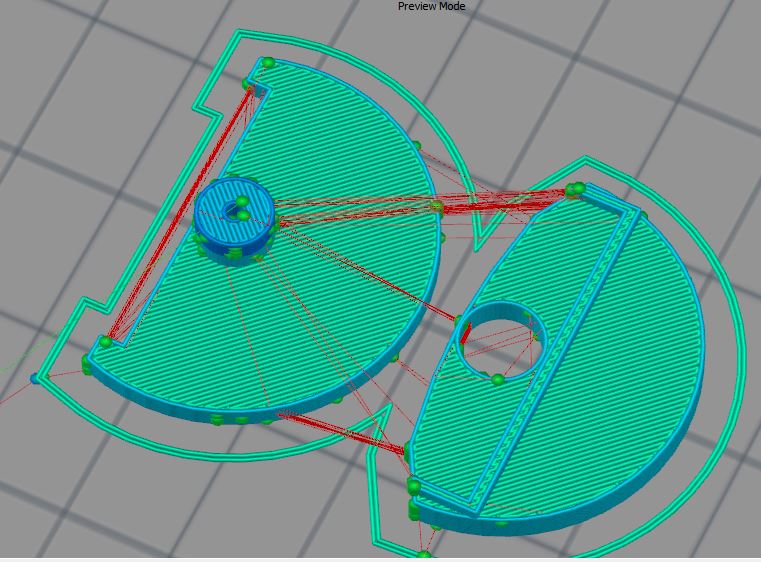
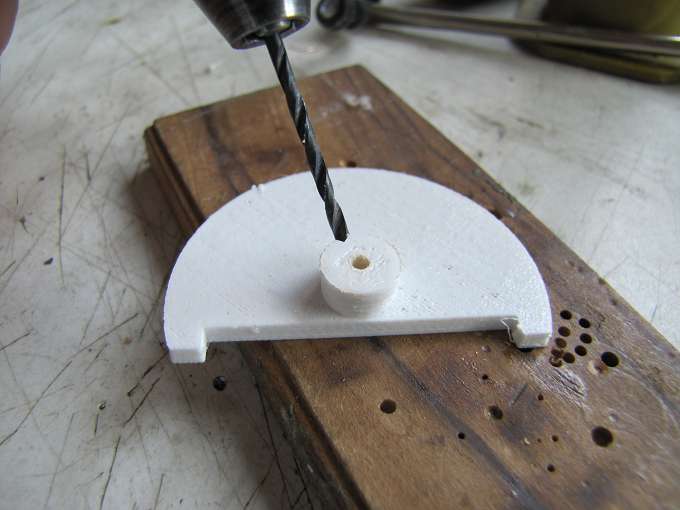
I started with the construction of the speaker. At the weekend I was with my printer on the Experts' in Mainz, where I ever designed and printed the first prototype. 
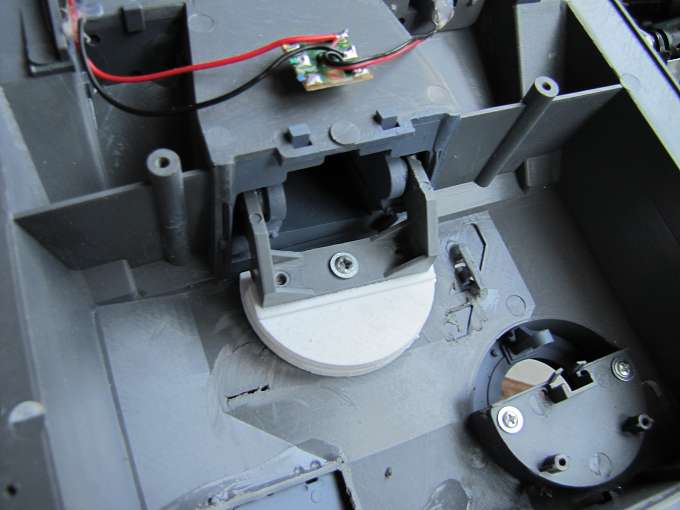
To such a seemingly simple components in a tub fit perfectly You usually need three to four prototypes, but then it sits. 
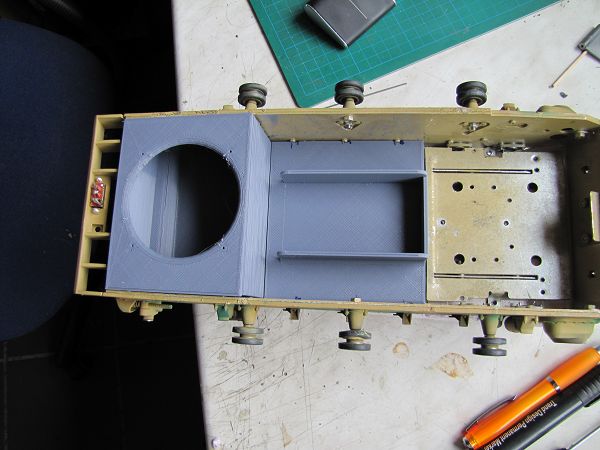
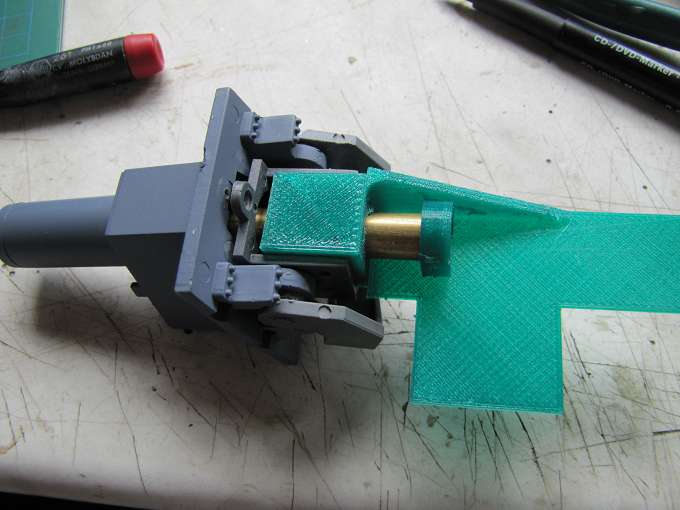
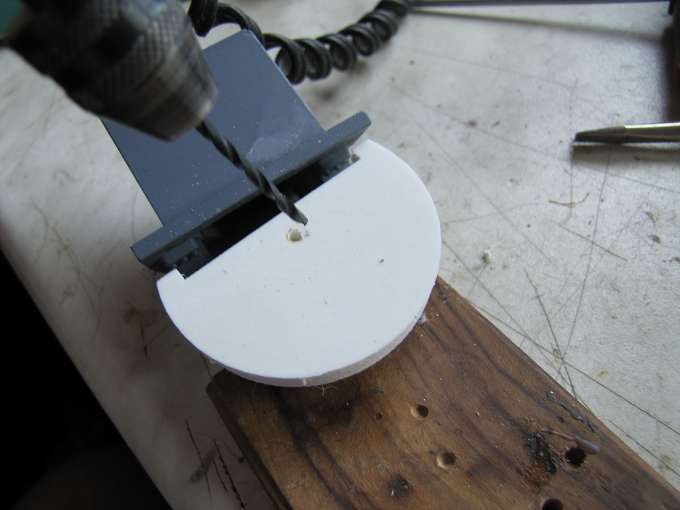
The second version fits much better but still not perfect. 
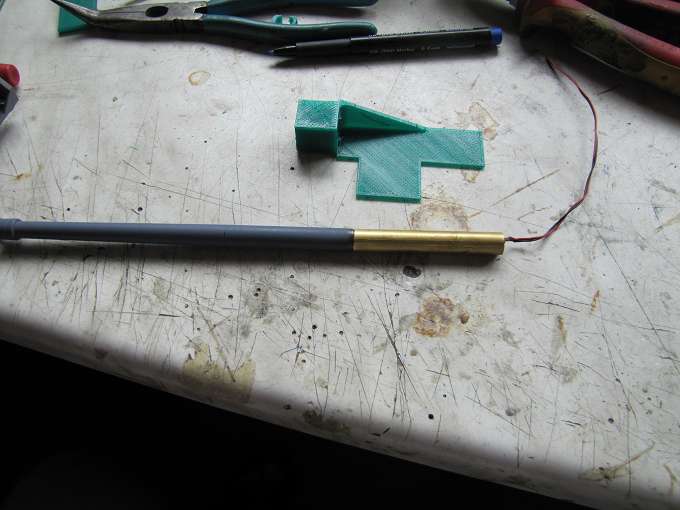
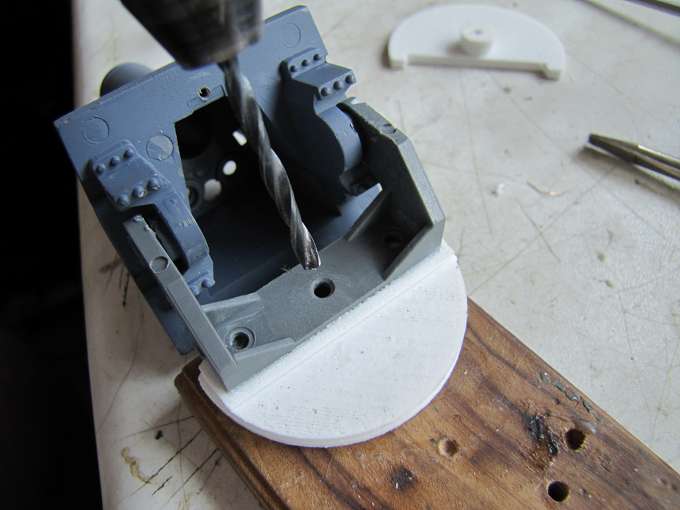
Therefore, the third version of the Box is currently running on my printer and now it could fit after I have now also takes into account a recess for the transmission of the pipe evolation. |
Auteur: | Edwin Altmann [ 01 jul 2014, 17:06 ] |
Titel: | Re: A new job remodeling a Stug |
Overnight, the first prototype with recess for a central battery is now created. But this is still buggy and even so I'm still not satisfied. By the way, I started with the production of parts for the suspension and the same for multiple tanks. |
Auteur: | Edwin Altmann [ 04 jul 2014, 18:23 ] |
Titel: | Re: A new job remodeling a Stug |
Somehow me very little time is currently allowed to do something, but a little bit it goes on. The construction of loudspeakers and electronics box below vorran. So you get very close indeed, but a battery with this great speaker under. However, for this model, I'm still a speaker without these recesses which then has a little more volume. Until all the parts that I need to arrive with me but I have ever started to disassemble the tub. And I've still managed all attachable spoon that I had started last time ready to mill. |
Auteur: | Edwin Altmann [ 05 jul 2014, 17:06 ] |
Titel: | Re: A new job remodeling a Stug |
This morning was now the final speaker, as I will install it finished. I only had to remove a few supporting Struck doors. And so now the parts fit into the tub. To prepare the suspension, I have expanded the two strips with the retainers of the axes one by one, re-attached the holes to 3.1 mm Broken Drills and in the tub. To find out the exact length of the axes, I simply use a wooden skewer, I cut until it fits snugly. After this presentation, I could Cut the 12 steel rods for the axles and grind at the solder joint. Nch degreasing I stretch the spoon holder in pairs in a vice and put one of each solder into the hole. The holders are then heated from below with a fine flame until the solder melts down on its own. Then I warm the ground side of a steel rod and melt some tin on. I put this then with a twisting motion slowly into the hole while I the holder with a small flame Warm. Thus, the tin is pushed out slightly and the two parts perfectly connected. |
Auteur: | Edwin Altmann [ 07 jul 2014, 19:53 ] |
Titel: | Re: A new job remodeling a Stug |
Feathers, feathers, feathers, If I do that, then more equal, and so it still the same issue which for a E25, two tigers and a panther to do so. The springs I wrap my little lathe to a 3mm steel rod. The whole I'm doing with a hand crank machine is switched off. Next, I have the same yet drilled the collars to fit the springs. Third, I started with the improvement of the chain tensioner. To this end, I have to replace the fixing of plastic through metal. That's why I shoot a brace of aluminum which simultaneously stiffens the hull. The sides of the hull I drill on both sides on 9mm and glue the strut to the hull one. And the chain tensioner are back in place, but much more stable. |
Auteur: | Edwin Altmann [ 13 jul 2014, 19:01 ] |
Titel: | Re: A new job remodeling a Stug |
Currently I am unfortunately again busy with many things, you do not need, but still it goes a little further. Slowly, the suspension is complete. For this operates flawlessly and is well adjusted I still have to assemble a lever. For this I use pieces of 10 x 10mm aluminum profile. In this I drill two holes and cut each one in this thread M3. For installation, I think its angle fixed in proper position and makiere the holes on the tank bottom. These posts are then provided with a center punch and drill. At the bottom of I then sink to the bottom. So I have a later almost smooth floor. Then I makiere the places where I put the springs through the angle. Granulation again and drill. So I can then mount angle by angle. In order for the suspension without the expansion of the transmission is set I have to make in the gear plate two cutouts. This I draw on and separate them with small cutting discs. And so I can now adjust suspension ever. At the end of today I was able to prepare the gear for installation of brushless motors. |
Auteur: | Edwin Altmann [ 17 jul 2014, 19:02 ] |
Titel: | Re: A new job remodeling a Stug |
For the speaker and the electronics I have now printed the final version. Next I do with the gears, the first time take place to see the attachment and Platzverhätnisse. Each gear I mount with only two screws and around these also to be able to just clip on the plate I have to make a new hole in one of the two and all file it out a bit. So I can then clean hull mounted in the side by side. The inertia I saw on a pole and turn this match. After a try I still have to drill the mounting screws and so I can screw it to the motors. Last, they are still balanced and can now be mounted as in the transmission. |
Auteur: | Edwin Altmann [ 19 jul 2014, 16:18 ] |
Titel: | Re: A new job remodeling a Stug |
To be able to mount the gear ready I had to unscrew the holes in the pinion to 3.17 mm shaft diameter. The drilling works not so well through the transverse bore of the clamping and runs like. And so I can now combine gears and motors. Since inertia is something I must project beyond the transmission tilted code that into the Hull. The easiest way with a 3mm pad that I splicing with the mounting plate. Shoring The axis I'm very easy again with epoxy putty and ball bearings under the countershaft covers. [img]http://up.picr.de/18958537hx.jpg [/ img] The gearbox itself, of course, get a cover after I have it well lubricated. I had to adjust a little while. In each tank is different, but I think as the now looks quite acceptable. Even the mounted control and sprockets and raised the chain. So it goes in great steps to the first test drive, but previously been programmed the controller. So I could move the Stug now today in a first test drive at 34 ° C in the shade on the grass, by the way .... without any heat problem with all parts. https://www.youtube.com/watch?v=a1T2pki ... e=youtu.be A few settings are still necessary, but it runs quite acceptable. |
Auteur: | Edwin Altmann [ 22 jul 2014, 17:55 ] |
Titel: | Re: A new job remodeling a Stug |
And on it goes. Now I have to construct a new cannon rocker with side direction of servo operation. For this purpose, but one must first remove the cannon and that is something Trickie. First one makes the front of the Karlotte the cover carefully. Among them are 2 screws one turn out. Then you have at the bottom of the inside release a third screw and unscrew the cradle bearings from the roof. Then you can pull out the gun forward and screw the recoil from. During this time, the first prototype on the printer was ever done. But this is still a bit too long and does not fit properly. Why I have not printed a second version fits much better On the gun barrel I have ever stuck a brass tube as an extension lead. Today I will then also a little concern myself more with the side straightening. I can then install separately from the Evolation. |
Auteur: | Edwin Altmann [ 23 jul 2014, 19:36 ] |
Titel: | Re: A new job remodeling a Stug |
Now I do have first gone on with the electrical system a bit since my printer is busy. First loaded and checked the new battery if it's okay. A complaint after the conversion is not recognized. When I use Battery 8 cells Nihm what has turned out for me as perfect. The battery I cut gently in the middle to shrink the tubing and wrinkle it easy from. The sheet metal connector I turn wary of Poland from causing a short circuit without and loop to the now exposed terminals. ZumVerlöten I use a cheap soldering iron from the hardware store. It is important in this is that he has at least 80-100 watts of power to the battery to be able to solder quickly and so gentle. Before I connect the battery again I still need two matching of the length of cable which I well tin solder at both ends. It should not save the tin man. I also binge tin on the poles of the batteries, but always make sure they do not pay attention anyway just to close. So I solder now always positive and negative poles of the battery opposite. In order to prevent a short circuit because I glue one end of the cable first from yet. About the free ends I stick then duct tape and so the battery can now take place in the tank. The last few days is also the Beier sound module and the station arrived. The transmitter I have spent today first time to the charger. The sound module I install ever with all the cabling piece by piece. |
Auteur: | Edwin Altmann [ 24 jul 2014, 17:57 ] |
Titel: | Re: A new job remodeling a Stug |
After the transmitter is now loaded I could him today programming and everything went as usual after a few small adjustments as it should. The only little thing was a fuse. 20A is too little when you brake fully. Now 30A are installed and that should hold. Then the speaker was still in the series. First I glued the lid and made the holes for the connecting cable. As damping insert a piece of filter for cooker hoods has proven to me. Thus, the space in the tank is optimally utilized and also the upper tray fits perfectly on it. |
Auteur: | Edwin Altmann [ 25 jul 2014, 15:59 ] |
Titel: | Re: A new job remodeling a Stug |
Once the lower hull with the associated technology is now almost ready today I have been interested in the programming of the sound module. And of course, tried out in the wild. https://www.youtube.com/watch?v=BeEcjSF ... e=youtu.be The final details are still lacking, but I'm then using the technique of upper hull. |
Auteur: | Edwin Altmann [ 26 jul 2014, 16:37 ] |
Titel: | Re: A new job remodeling a Stug |
Currently I only had the time to construct a pivot for the carriage of Stugs. However, the G-code for printing is also ready and maybe I can still make overnight. There is now separated to Page Align the Stug the rocker and the pivot bearing can now be both, or just the rocker rebuild. |
Auteur: | Edwin Altmann [ 27 jul 2014, 16:37 ] |
Titel: | Re: A new job remodeling a Stug |
The hinge was this morning then printed. But to install it I had to prepare a few things. In the upper part disturbed nor the old fortifications and the box and the gunner's hatch had to get away. In order to mount the mount to the pivot, I have this but not glue it and attach the holes for the screws. First, pre-drill the joint with a 2mm drill. Then put the gun mount it and this pierce to the hinge as a template it with the 2mm drill. Last drill out the mount from the top with a 3mm drill. So you can then glue the joint base to the hull top, put through the gun carriage from the front and befesigen with a screw. So you get a stable, smooth-joint to Page Aim the cannon. Next, the canon rocker stuck in the inner part of the mount, with 2mm pre-drilling and screw. For installation of the rocker, I now had to cut a little bit. So the rocker but can be re-installed as described in the expansion. [img]http://up.picr.de/19036608cp.jpg /img] And so now looks like the scales in favor of the side Align. I have already placed the servos to end for today. |
Auteur: | Edwin Altmann [ 02 aug 2014, 16:34 ] |
Titel: | Re: A new job remodeling a Stug |
And again it is coming to a piece, none of completion. Today I installed the three servos and also still the same program the Align to Page on the transmitter. So you can align with a knob at the side the gun now. The Evolation and the RCC, I must still be programmed directly at Beier sound module, but before that I have the veritable camouflage headlight and the excess flash. So I'm going to the Stug then can pass its owner in Derbach 23. By the way I now also have the parts to Page Align optimized and started a few to print them for printing the canon and the rocker bearings somewhat. |
Pagina 1 van 2 | Alle tijden zijn GMT + 1 uur |
Powered by phpBB® Forum Software © phpBB Group http://www.phpbb.com/ |