G-spot
Geplaatst: 27 aug 2007, 17:51
No, this thread won’t be dedicated to this young lady takling about females’ secrets, sorry for that.

Photo: borrowed from: www.kalendermacher.at
Dear friends,
It’s a long time ago I posted here on the forum.
This thread is all about this old pal:
the "301" of 2nd Panzerdivision, given up by it’s crew because of technical breakdown in the area around Clervaux, Luxembourg in January '45.

Foto: Scan taken from “the battle of the bulge”/steven zaloga/concord publications
Prior to this article I would like to ask all of you, if someone may have some more photos of 301 and could provide me with this, if so.
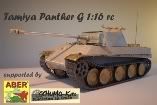
Tamiya Panther G bringing on the spot:
Due to John Cantons’ brilliant article of scratch building his G up to a fantastic model, it seems most is already said and done about this kit. But – one may have considered that some day there will exist a bunch full of upgrading parts.
Okay, here we are: my target is to show out that there are parts of e.g.: Axel’s Modellbaushop to be used to turn the Tamiya G out to a real detailed model despite his poor character by just building it out of the box, by preventing myself from too much scratch building and just using as lots of after market parts as possible.
I started with the upper hull, despite the manuals chronology, by cutting out the drivers’ and radio operators’ hatches:

The new hatches are provided by schumo kits:

Also the aerial base will be replaced:

The wooden block on the right side of the tank coming with the Tamiya kit is very poorly detailed. Of course this will be replaced as well:
2 different versions are available:

Detailing of this part is fantastic:

Tow cables are also coming from Axel:


The crew heater, already prepared for the ABER PE set upgrade and smoothly surface finished by use of a Proxxon and a ball shaped milling head to simulate it’s rough cast character:

For the time being this concerned the rough work spent on the upper hull. Of course there will be some surface finish and the detailing following.
Ahead with the turret:

Partly closing of the opticals and some weld seams are added by use of Magic Sculp.
Surface of the vertical panels is treated by using Revell-Glue and Tamiya Putty.

Cut out of the escape hatch:

The original Tamiya gun mantlet is replaced by the excellent schumo casted part:

Also the gun barrel will be changed. The difference in length and layout can be noticed by one spot:

This was followed by construction of the lower hull. With the exception of the Impact track kit I built this step according to the Tamiya manual.

Minor work was spent on the front plate, whereas the kit part for this area is quit insufficient. This was realised by use of some Poly profiles and sheet. Again, both weld seams seen here are created by use of Magic Sculp:

That concerned the rough warm up.
As during last week the first Prototyping sheets of the ABER Panther G PE basic sets arrived via Axel, I am really looking forward going ahead with the build by detailing.


The workable tool clamps are already soldered.
Front fenders you see here are not soldered, yet.

Hope you enjoy reading the article. All parts up to now are provided by Axel – but this may not turn into an Axel Marketing thread. Furthermore I will use some other parts as well. My basic intention is to show up where to get these parts and what is available.
As soon as I go ahead with the next step of surface treatment and PE detailing I will post new photofiles.
Cheers
Uwe
Photo: borrowed from: www.kalendermacher.at
Dear friends,
It’s a long time ago I posted here on the forum.
This thread is all about this old pal:
the "301" of 2nd Panzerdivision, given up by it’s crew because of technical breakdown in the area around Clervaux, Luxembourg in January '45.
Foto: Scan taken from “the battle of the bulge”/steven zaloga/concord publications
Prior to this article I would like to ask all of you, if someone may have some more photos of 301 and could provide me with this, if so.
Tamiya Panther G bringing on the spot:
Due to John Cantons’ brilliant article of scratch building his G up to a fantastic model, it seems most is already said and done about this kit. But – one may have considered that some day there will exist a bunch full of upgrading parts.
Okay, here we are: my target is to show out that there are parts of e.g.: Axel’s Modellbaushop to be used to turn the Tamiya G out to a real detailed model despite his poor character by just building it out of the box, by preventing myself from too much scratch building and just using as lots of after market parts as possible.
I started with the upper hull, despite the manuals chronology, by cutting out the drivers’ and radio operators’ hatches:
The new hatches are provided by schumo kits:
Also the aerial base will be replaced:
The wooden block on the right side of the tank coming with the Tamiya kit is very poorly detailed. Of course this will be replaced as well:
2 different versions are available:
Detailing of this part is fantastic:
Tow cables are also coming from Axel:
The crew heater, already prepared for the ABER PE set upgrade and smoothly surface finished by use of a Proxxon and a ball shaped milling head to simulate it’s rough cast character:
For the time being this concerned the rough work spent on the upper hull. Of course there will be some surface finish and the detailing following.
Ahead with the turret:
Partly closing of the opticals and some weld seams are added by use of Magic Sculp.
Surface of the vertical panels is treated by using Revell-Glue and Tamiya Putty.
Cut out of the escape hatch:
The original Tamiya gun mantlet is replaced by the excellent schumo casted part:
Also the gun barrel will be changed. The difference in length and layout can be noticed by one spot:
This was followed by construction of the lower hull. With the exception of the Impact track kit I built this step according to the Tamiya manual.
Minor work was spent on the front plate, whereas the kit part for this area is quit insufficient. This was realised by use of some Poly profiles and sheet. Again, both weld seams seen here are created by use of Magic Sculp:
That concerned the rough warm up.
As during last week the first Prototyping sheets of the ABER Panther G PE basic sets arrived via Axel, I am really looking forward going ahead with the build by detailing.
The workable tool clamps are already soldered.
Front fenders you see here are not soldered, yet.
Hope you enjoy reading the article. All parts up to now are provided by Axel – but this may not turn into an Axel Marketing thread. Furthermore I will use some other parts as well. My basic intention is to show up where to get these parts and what is available.
As soon as I go ahead with the next step of surface treatment and PE detailing I will post new photofiles.
Cheers
Uwe


 Can't be cheap with all the upgrades!
 I better do not count the dollars. But prior to the colour I will list all used parts incl. prices. Just to get an idea about the invests on an upgraded Tamiya Panther.