Battle Tanks Nederland

BTN is de club voor 1:16 en 1:15 RC BATTLE SYSTEM tankliefhebbers
Het is nu 03 mei 2024, 06:42

Alle tijden zijn GMT + 1 uur


Plaats een nieuw onderwerp Antwoord op onderwerp  [ 10 berichten ] 
Auteur Bericht
BerichtGeplaatst: 01 mei 2013, 17:31 
Hello,

Today I have the technical reconstruction of HI-tiger with aluminum tray.

This is a new suspension, chain tensioners, helical gear units with brushless motors, a sound module Beier, and otherwise get a new electronics.

This is the initial state ....

Afbeelding

Afbeelding

First I cut all the times lower hull and build from what I do not need to the tub looks.

Afbeelding

When building I eginne with the suspension. All I can use the old retainer of Toro Sion suspension, but this has to drill to screw in 3mm. For this purpose I build only the bars and drill the remaining holders mounted on the drill out.

Afbeelding

Next, I'm the spoon the swing arm axles of brass. This length I and milled from the spoon.

Afbeelding

Afbeelding

To get it usable axes I must also add a 3mm hole.

Afbeelding

After I cut and sanded 16 pieces 3mm silver steel rods I can solder it into the spoon.

Afbeelding

Afbeelding

That's it for today.


Omhoog
  
 
BerichtGeplaatst: 02 mei 2013, 15:46 
Thus, as the Tigers next week must be completed, it is also right on.

Today I had to build new collars, as I had no more to me first, because I have my daughter again clamped.
I will provide this for some time with two grub screws, since then the clamping is much safer.

Afbeelding

Afbeelding

When I had the 16 pieces together was the wind the springs on the series. I'm preferably with a hand crank on my small lathe, but always make sure that there is Normally this. As a crank beats pretty around.

Afbeelding

Afbeelding

Afbeelding

So I finally was able to install the spoon axes.

Afbeelding

The retainers I'm back from a 10 x 10mm aluminum profiles, which I cut in this case 20mm long pieces and these versehe after drilling with two M3 threads each.

Afbeelding

Two of the brace I could install today. Then the rest will follow tomorrow and then the tub springs before.

Afbeelding


Omhoog
  
 
BerichtGeplaatst: 03 mei 2013, 16:19 
Today was the first remaining work on the suspension on the series.

The screws on the bottom of the pan, I went as far as it sunk again. The aluminum of the pan is already buttery soft as I again was able to find time. This has nothing to do with duralumin.

Afbeelding

The suspension of the front swing arms, which have sticking out from under the gear drive I installed in the center to set it even when mounted to gearboxes.

Afbeelding

The gear plate itself was still provided with cutouts. So nothing touches of the suspension and you get to the collars.

Afbeelding

Afbeelding

So then I was able to mount the gear daruf after I had also made new mounting holes for this.

Afbeelding

Then there were the supports of the axes in line. I make each of these a large ball bearing that I epoxidized with kneading and the countershaft cover Cemented.

Afbeelding

Afbeelding

Afbeelding

Once you have the suspension have ever set the tub now looks something like this.

Afbeelding

Now all we need is the chain tensioner. I have to hone your aluminum tank something.

Afbeelding

Afbeelding

The holders of the chain tensioner I turn from a brass rod 22mm

Afbeelding

Afbeelding

Afbeelding

Afbeelding

After the bearing pieces are finished I fix it on a continuous axis, and mount it inside the tub.

Afbeelding

For the eccentric I use a 8 x 10mm brass rod in the I install two holes with 6mm spacing.

Afbeelding

After I cut off from the eccentric rod I solder it hard to 6mm silver steel axles.

Afbeelding

Afbeelding

The eccentric be cleaned of flux, turned and ground in form and are ready for installation.

Afbeelding

I connect to stiffen even the axes of the eccentrics with a matching brass tube and so then see the assembled chain tensioner from now.

Afbeelding

Afbeelding

I've adjusted the suspension for about 5.5 to 6kg weight and mounted the drive chain to the end for today.

Afbeelding


Omhoog
  
 
BerichtGeplaatst: 04 mei 2013, 15:28 
And it goes on.

After the drive is finished as far as the internals come next and then I will start with the battery.
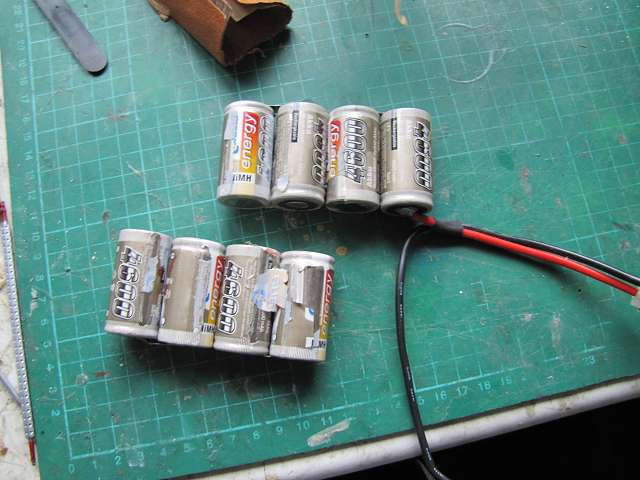
In addition I have the big C with a 9-cell 4600 mAh bought the pack of the form is not useful as it is, but very cheap. But that is no obstacle.
Since 8 cells have been shown to be ideal was gone for a cell and the others will be ANDing 2 x 4 cells.

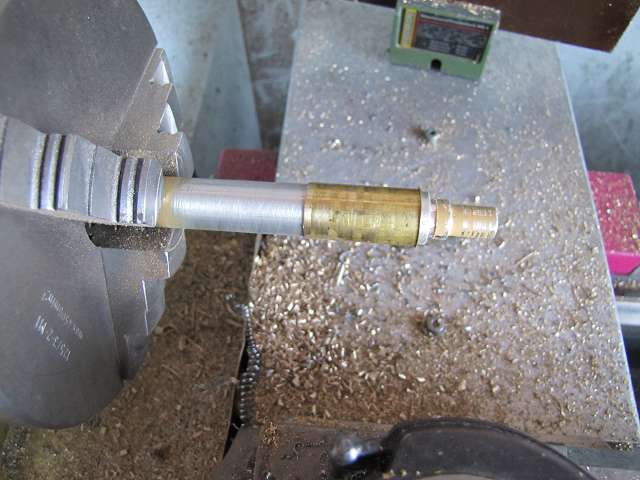
Zuerstmal I leave the appropriate connections to each other and pull the unusable Lötfahenen carefully with a pliers and scchleife to the poles. The individual cells in series I as I need them and connect them with superglue. Then I use a cheap soldering iron from the hardware store with at least 80W to be able to solder fast enough without damaging the cells and binge solder to the poles.

Afbeelding

Afbeelding

For the new connections I use a small piece of copper matte, which I loop and also coated with tin.

Afbeelding

Afbeelding

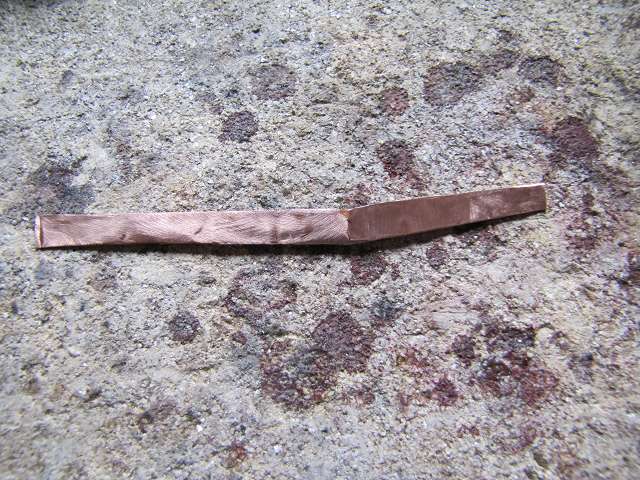
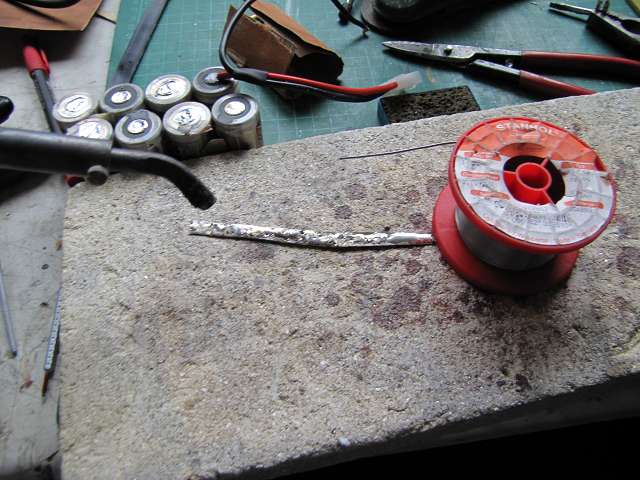
Now I just have to cut the copper in each case a suitable piece and solder to the poles and you have a reliable high-current connection. The two packs I still connect with a cable and solder and the second connector cable. With shrink tubing the whole is then isolated and the battery is ready.

Afbeelding

Afbeelding

Afbeelding

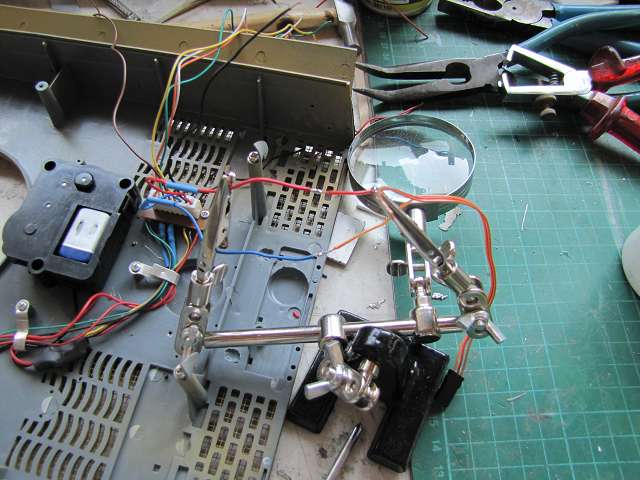
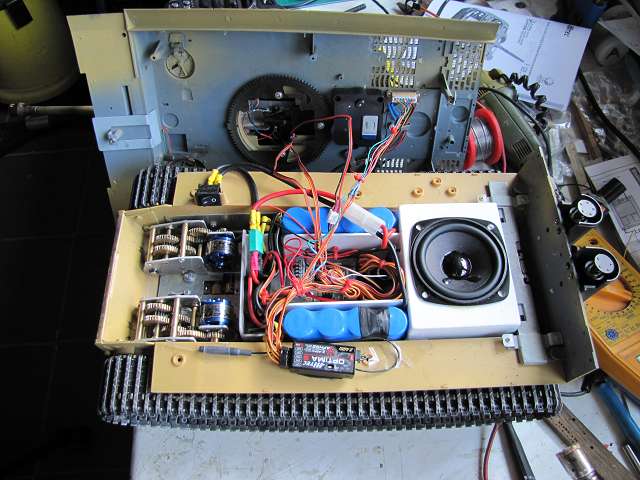
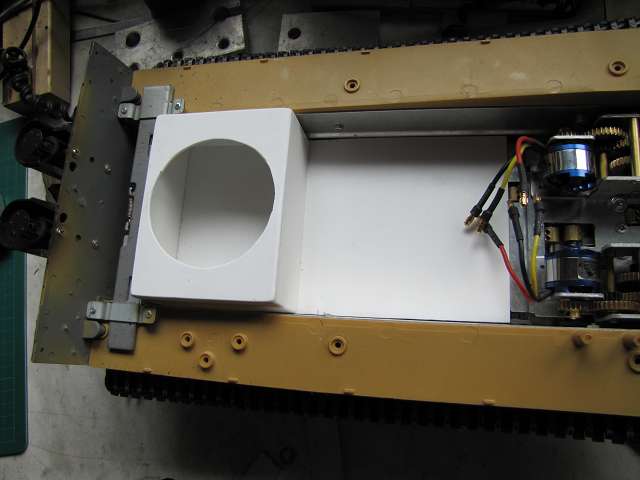
As the base plate of the internals I fit on a 2mm poly plate and I put in here to talk to sit down speakers and battery.

Afbeelding

All RC installation I do, that everything is just simply in the tub and can easily be taken out again when you need to spring times.
The cabinet I'm building, having the dimensions are fixed to the back of the tub and in front of a small box for the sound module in the middle. This also keeps the batteries at the same iherem place.

Afbeelding

Afbeelding

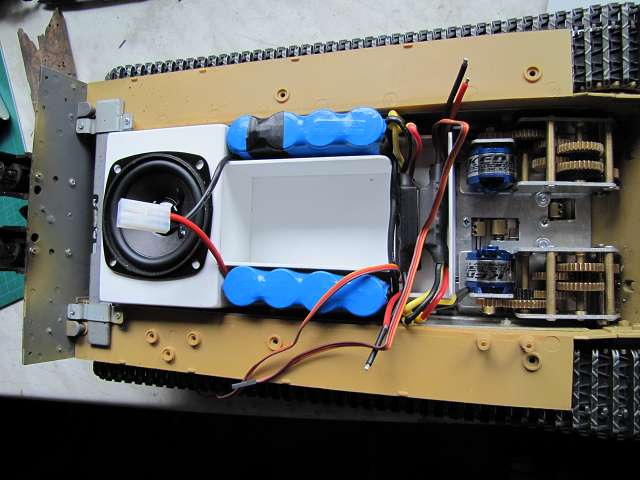
When I put the speaker damping mat still out with a piece of filter mat for a kitchen hood.

Afbeelding

A second, smaller electronics box I build another across the front of the middle. This diehnt as a stop for the battery and recording the controller.

Afbeelding

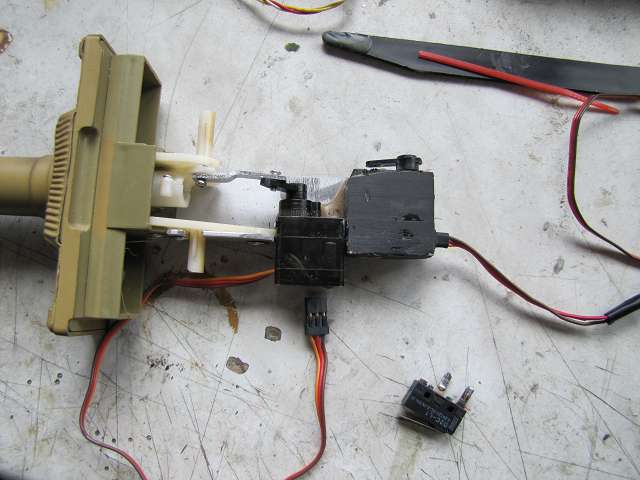
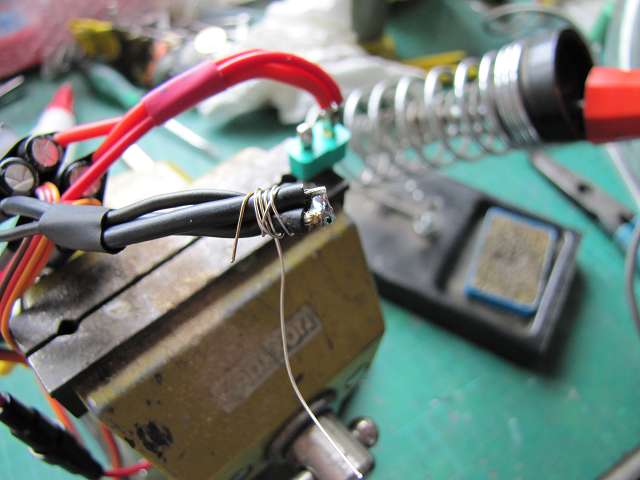
Then first was the soldering of the cable and switch on the series. Plus a little trick I solder on a plug multiple cables wants to burn your fingers without me. The combined, I wrap a thin wire and so they can now easily be soldered with a solder tag. If everything holds then simply agree to wire back and shrink wrap it.

Afbeelding

Thus, the tub looks times until now, and now I must first load all the batteries to make more tomorrow.

Afbeelding


Omhoog
  
 
BerichtGeplaatst: 04 mei 2013, 17:54 
Offline
Gebruikers-avatar

Geregistreerd: 12 jan 2005, 20:22
Berichten: 3334
Woonplaats: gorinchem
what kind of transmission do you use?
looks smal

_________________
http://s38.photobucket.com/user/reinier ... 1.mp4.html

http://s38.photobucket.com/user/reinier ... w.mp4.html


Omhoog
 Profiel  
 
BerichtGeplaatst: 04 mei 2013, 19:46 
Hi Reinier,

the motors from small to see because there are Bruhshlessmotoren but nevertheless each of which has up to 180W.
The gear to be revised by me for the performance Asiatam flat gear.

regards Edwin


Omhoog
  
 
BerichtGeplaatst: 04 mei 2013, 20:17 
great work.
Wat material did you use to make the springs.???


Omhoog
  
 
BerichtGeplaatst: 04 mei 2013, 20:22 
Hi Michel,

I use spring steel for the springs in different strengths with which I then wrap the ends of springs pass for each vehicle. So I can adjust the suspension so that the driving behavior of an original coming closer. However, there are also physical limits already. You can not always replace missing mass.

regards Edwin


Omhoog
  
 
BerichtGeplaatst: 05 mei 2013, 16:09 
It continues with the things I do not like matrimonial doing cable soldering.

This was now the first wiring the upper hull of the series. For the tower drive I use a micro controller of Sol-Expert.

Afbeelding

Afbeelding

The principle is basically nothing more than a kind of servo electronics and does not need any additional power supply. If you like him here operates only with one third of the specified maximum power one also has no problems with it and the tower turns nice and slow.

As a connector I use simply the HL Header which I also two resistors for the camouflage headlight and the MG

Afbeelding

Afbeelding

This way, I can now calibrated screw again iherem alen space and even solder the power connector for the tower to the connector.

Afbeelding

Afbeelding

Then I first gutted the tower.

Afbeelding

The gun barrel had no right leadership and almost 1mm play in the pipe. I had to first change with a new leadership, now it runs smoothly and without play.

Afbeelding

Afbeelding

Afbeelding

In order to make the recoil and the lifting and lowering with reasonable servos I verschraube an aluminum bracket with the first tube holder.

Afbeelding

Afbeelding

And so the servos are placed later.

Afbeelding

But since I need to install the servos a functioning electronics, first I had even set the transmitter and in this context was immediately added a first test run on the series.

Afbeelding

http://www.youtube.com/watch?v=az9fraD3 ... e=youtu.be


Omhoog
  
 
BerichtGeplaatst: 07 mei 2013, 15:18 
Today the tiger is ready.

First I glued the two servos on the cradle and the recoil to a lever with the front servo. This factor may be a fixed connection, dai I detailed all the wonderful end positions in Beier can adjust sound module later.

Afbeelding

After I put the gun in her cradle I must then connect the servo to the elevation turret roof. I stick to an aluminum angle to this, and also build a connecting rod.
Then there was only the new button for the speed camera on the series, which is triggered by the tiller of the recoil servos. For the speed camera so I need no other electronics.

Afbeelding

Meanwhile, a whole lot of cable in the tank and the installation takes almost longer than the programming of the sound module.

Afbeelding

After I finished everything so far, I can set the upper hull with even more cable on the tray.

Afbeelding

Then of course was a final test of the series.

Afbeelding

http://www.youtube.com/watch?v=5oKiHlLc ... e=youtu.be


Omhoog
  
 
Geef de vorige berichten weer:  Sorteer op  
Plaats een nieuw onderwerp Antwoord op onderwerp  [ 10 berichten ] 

Alle tijden zijn GMT + 1 uur


Wie is er online

Gebruikers op dit forum: Geen geregistreerde gebruikers en 2 gasten


Je mag geen nieuwe onderwerpen in dit forum plaatsen
Je mag niet antwoorden op een onderwerp in dit forum
Je mag je berichten in dit forum niet wijzigen
Je mag je berichten niet uit dit forum verwijderen

Ga naar:  
cron
Powered by phpBB® Forum Software © phpBB Group
phpBB.nl Vertaling